|
|
HOME | FORUM | SERVERS | RULES | LINKS |
|
|||||||


| Games Discuss anything relating to games |
 |
|
|
Thread Tools | Display Modes |
 11-07-18, 10:37 AM
|
#1 |
|
Community Member
Join Date: Mar 2018
Last Online: 12-03-24 02:35 AM
Total Donations: £0
Posts: 130


|
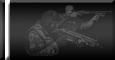
Room and structure clearing tactics are meant to keep adversaries guessing, and in turn, prevent them from acting before the entry team is able to dominate the room and neutralize the threat. Humans take action following a four step process of observing, orienting, deciding, and acting. This process is known as the OODA loop. https://www.officer.com/training-car...ensive-tactics We want our operators to be able to cycle through the loops faster than the adversary, and use tactical coordination to prevent the opponent from cycling through their OODA loops unimpeded. The three basic advantages that must be pressed are surprise, speed, and violence of action. In order to bring these to bear on any opposing force, tactics must be developed, trained, validated, refined, and trained some more until they are consistently repeated and become reflexive and instinctual.
Fortunately, room clearing is relatively simple when a team is selected, trained, and equipped properly. In the gaming world, many of the real life tactics and principles can either be used directly or modified to fit given parameters. This is meant to be a guide to successful room clearing for SWAT4 series games. Teams may be any size, but the best teams consist of numbers in the three to six range. Point is up front, Cover has his back, the Lead runs the show, the Breacher uses explosives or breaching shotgun, the Trailer helps clean up, and the Rear maintains watch over the entry team's back. Room clearing begins with the team stacked at an entry. With any luck, skill, or combination of both, the team reaches the entry point undetected. A typical stack formation consists of: Point, Cover, Lead, Breacher, and Rear. In three person teams, the lead also has the Rear role. In teams of four, the Rear has Breacher duties. Trailers would be situated between the Breacher and the Rear. Trailers may also assist with rear security when not needed to support the entry. There are two basic room configurations: corner fed and center fed. Of course there are countless interior configurations within rooms. There are visible and blind corners--sometimes known as soft and hard corners or easy and hard corners. This is important because, in general, the Point will enter and move in the direction of one of the near blind corners. A corner fed room has a door near a corner, and therefore only one near blind corner at the opposite end. A center fed room has a door more central to the room's layout--resulting in two near blind corners. In these rooms, it's not always known which direction the Point will choose, so the Cover needs to read and react. Rooms also have weak sides and strong or heavy sides. The side that has the largest surface area is the strong/heavy side. Within the room there are sometimes additional corners due to obstructions, partitions, or the like. These are known as following or follow-on corners. These must also be cleared before the all clear signal(video) is given. To consider a room clear, the entry team must establish points of dominance within the room that establish interlocking and/or overlapping fields of fire or sectors. The larger rooms obviously require larger teams and deeper penetration along the near and side walls by the first two assaulters. Smaller rooms can be dominated with fewer assaulters and minimal penetration. We will now explore how to clear different types of rooms of common configurations, the keys principles of room clearing remain unchanged: Do not move without a purpose or destination Get through doorways quickly Move opposite of the man ahead of you Move along the walls Establish points of dominance Do not sweep your muzzle across a friendly (video) Stay out of the middle Communicate (video) Secure the area Clean the area Confirm rear security before advance or exit Corner Fed Rooms (video) Stack to the side of the door with the knob Point takes hard corner back along the knob side wall Cover moves forward, but glances behind the door on the way Third man follows Point and sweeps from center toward Point's sector Fourth assists by sweeping from center toward Cover's sector Center Fed Rooms (video) Stack to the side of the door with the knob Point rides the door across the opening to the hinge side hard corner (In SWAT, the doors only open 90 degrees, so Point should always take the knob side hard corner) Cover moves to opposite hard corner Third man follows Point and sweeps from center toward Point's sector Fourth assists by sweeping from center toward Cover's sector T-Shaped and L-Shaped Rooms In Ts, Point and Cover may each end up taking two consecutive hard corners on their chosen side depending upon if the funnel leading to the T is set up like a corner or center fed room. In Ls, the person on the strong side will wait for backup or for the Lead to give the order to proceed to his follow-on hard corner. (video) In both cases, the assaulters should communicate that they're moving on, or the Lead should give the command to proceed beyond the initial entry and first points of dominance(video) if the advance bogs down. Partitions, barricades, and other physical obstructions will alter the flow of the room. It's important to plan for what is known, communicate what is new, as well as what your intentions are. It may also be advisable to halt the advance and allow the Lead to make the decision. Often the Lead has a more complete picture of the entire tactical situation and can get things moving again with a couple of quick commands. Sometimes, if surprise is lost, the team is out of tac-aids, and the enemy has its focus on the entryway, a minimal or zero penetration room clearing method(video) is advisable. In this method, the entry team engages the room from the outside using the walls and door frame for concealment and/or cover. Walls, in general, are considered concealment, but near the doorway, where the framing is built up to support the door, it can be partial cover as well. Fortunately, in SWAT4, walls are absolute cover, so this tactic is very useful. The Point may begin to slice the pie(video) from a short distance away from the doorway, and he may engage targets as he comes to them. The closer Point is to the door framing, the better his cover will be, the trade-off is that the further away he is from the frame, the better his concealment will be. In reality, presentation of your weapon may be manipulated. For example, depending upon which side of the door frame a member is situated, he may shoulder his weapon left or right handed. He may hold his weapon closer to his body in a high-ready position to delay flagging to the final instant before entry. He may transition to his side arm and use only one hand to aim into a hard corner, etc. In the game, this is not possible, and combined with the fact that walls are definite cover, the use of increased distance from the opening is very advantageous. Using this method, nearly the entire room may be cleared, except the extreme near hard corners, without ever stepping through the doorway. The Point and Cover may use a hi-lo cross or button hook(video) to clear the final corners, if there is no door attached to the opening or if the room occupants have previously swung the door outward into the hall. When a door has been swung into the room, a standard Point / Cover entry may be advised. Tactical Aid Deployment Any grenade is more effective when the duration between the door being opened / breached and the deployment of the grenade is minimized. (show video example of good and bad deployment) Flashbangs are effectively used to give the entry team a few critical moments to get through an entryway and into a room. The two most effective deployments are: near the doorway(video), to blind adversaries that have their focus on the doorway hoping to prevent the entry team from dominating a room or area, and air detonations(video) to ensure obstructions within the room don't block the light effect. Bouncing flashbangs off the door may find themselves in a corner or under an obstruction with limited effectiveness. The other benefit of flashbangs is their effectiveness is good against mask-equipped or unprotected adversaries . CS gas can be a good choice when the room is determined to have obstructions that might contraindicate the use of flashbangs. The effective duration of CS gas is much longer than that of a flashbang. Gas can also be effective to control or limit the ability of the opposition to get reinforcements to the point of attack. (video) If time permits, or if the team is moving covertly, an opti-wand can be used to get a very clear understanding of the tactical situation facing the entry team. The most realistic use of the opti-wand comes when a team remains undetected and checks all accessible doors before committing to a specific entry point, or checks as many closed doors and open doorways as possible without becoming compromised. Wand a room; clear a room may be effective in game, but would present challenges if applied in a true tactical deployment. Opti-wands are often overlooked and very useful to probe corners, Ts, open doorways, over half-walls, up a flight of stairs, through a window, around obstructions, etc. The more intel that can be gathered, the more the entry team may leverage its advantage. (cont...) The differences in deployment and effectiveness between breaching charges and shotgun breaches are obvious. If the team is in dynamic mode and has no opportunity to wand the area, the breaching shotgun is both faster and results in less potential for injuring room occupants. When the area around the door is clear, the explosive charge can really disorient anyone in medium proximity to the door. (video of time difference between c2 bang and clear and shotgun bang and clear) As with simple dry entries, when using grenades and/or breaching devices, it's best to minimize the time between opening/breaching and the detonation of any grenade applied to support the entry, and get the team through the doorway quickly. In order to achieve the proper timed release of the primed grenade to a shotgun breach of a door, release the grenade upon visual confirmation that the door is in motion—not on the sound of the shotgun discharge. We have all seen failed shotgun breaches followed by the tac aid bouncing back toward the entry team. In small units, where tac aids are limited, it’s preferred not to waste this gear. To time the release of the grenade with the C2 detonation, watch the physical countdown presented by the breacher and release in a ‘3…2…1…release’ pattern. (video) If done to perfection, the grenade will be in flight as the door blows in. Additional grenades may be used in the same range, or even deployed deeply into an area to maximize disorientation throughout the room. When multiple C2 charges are used to gain entry into a room, the detonations may either be synced, or staggered. Sometimes a staggered detonation may be beneficial to call attention away from the doorway being used by the entry team. When assaulting multiple rooms in the same hall, it is best to sync the detonations to take down the rooms simultaneously to give the adversaries no time to harden their defense. Teams at different entries may also want to coordinate assaults on multiple floors, or main and rear entries with synced or staggered C2 or shotgun breaches. Synced breaches are simply achieved by having a set point at which the plungers or the triggers are to be pressed. In SWAT, it’s easiest to coordinate with a GO,GO,GO command where the Breachers initiate their devices in a GO… GO… GO… PRESS sequence(video). It is our intention to show many of the key elements of room clearing in a series of chat-captioned screen shots and short videos. Often it’s easier to see a tactic than to read it and try to visualize what the writer was trying to convey. The intention is that anyone may use this guide to improve their game play and enjoyment of SWAT4, or any other tactical shooter platform. We hope this guide is useful. Enjoy.
__________________
SAS_Random Lt.Col 22nd SAS Elite Virtual Regiment Commanding Officer--Retired 
|

|

|
|
«
Previous Thread
|
Next Thread
»
| Currently Active Users Viewing This Thread: 1 (0 members and 1 guests) | |
| Thread Tools | |
| Display Modes | |


 Linear Mode

|
|

All times are GMT. The time now is 11:54 PM.